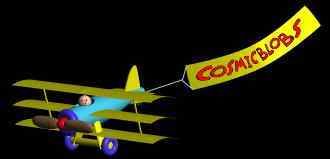
In beginning this blog I was determined to have as much fun as possible. And, this little exercise fits that goal perfectly.
I love to experiment in Cosmic Blobs and see just what is possible. To this end, I decided to try to create a fluttering butterfly. I have to admit that my first attempt was a failure becuase I chose the wrong animation strategy. I tried to animate the wings independently. It was fun and I learned a few things; but, I failed at accomplishing my goal.
But, this evening, as I was experimenting with another, completely unrelated idea, I found that if I added a decal to one side of a cube or sheet that had previously been painted with Vanish Varnish, it showed up on the opposite side!
LIGHT BULB ON!!!!
Completely surprised at this new finding I decided to try, once again, to see how close I could come to a fluttering butterfly. The Fluttering Butterfly video is the result! You can hear the excitement and pleasure in my voice at seeing how well the Vanish Varnish technique worked. It's amazing to me and I don't mind sharing my amusement in real time!
So... now let's prove just how easily amused Tom is by watching....
The Amazing & Dazzling Vanish Varnish Fluttering Butterfly Trick
I sure hope that you are as easily amused as I am becuase I HATE to laugh alone! And, I hope you are enjoying your own experiments with Cosmic Blobs... an absolutely wonderful program.
Wednesday, April 25, 2007
Monday, April 23, 2007
Cosmic Blobs Protozoa Animation Project
Long before I was a science teacher, I loved to culture and identify protozoa. It's been a lifelong hobby and one that I find fascinating. Perhaps my fascination began when I realized just how complex these 'simple one celled animals' really are!
Even though they are young, my granddaughters have also been fascinated with microscopes and the small world. But, there is one question that most teachers and parents face when working with children and microscopes. Is the child actually seeing the right things when they look through the scope. In this short animation project (Under 3 minutes) we show you how a student might demonstrate what they've seen by creating some blobs that behave like protozoa in pond water.
First, let's look at the real thing... a 'Backyard Infusion' taken through a microscope with a digital camera
Play Actual Video of Protozoa
Now let's look at the Cosmic Blobs animation. I was pleasantly surprised to find just how quickly and realistically the behaviour of protozoa could be simulated in Cosmic Blobs.
Play Project #3 - Simulating Protozoa in Pond Water
This one combined 2 loves-- Cosmic Blobs and Microscopy. I hope it helps to stimulate some educational applications for 3D modeling in your own home or classroom. Enjoy!
Saturday, April 21, 2007
Precision Flying with Vanish Varnish
Vanish Varnish, a wonderful feature found only in the Deluxe version of Cosmic Blobs, lets the Cosmic Blobs aerobatic team fly in perfect precision in this 2 minute animation tutorial. The team soars and rises then dives to earth in perfect synchronization. We'll show you how it's done.
Play Project #2 - Precision Aerobatics with Vanish Varnish
While recording this animation I noticed that the motion wasn't as smooth while Camtasia was capturing it and blamed it on Camtasia. But, what I didn't realize was that Windows had decided to run a background program to scan my drive just as I was recording this... so the processors were getting a real workout and smoothness suffered. Even so, I think we can agree that it does demonstrate that we can do some very interesting animations with Cosmic Blobs. I hope it gives you some great ideas for your own animation. This is a place for you to share those ideas with others if you'd like. Just let me know.
Friday, April 20, 2007
Cosmic Blobs Project #1 - Bugs and Light Bulb
This is the first of our tutorials having to do with specific projects. In this short tutorial we will create an animation of some bugs flitting around a light bulb. It will demonstrate how to use any blob as the 'floor' for our animation and also just how useful the Vanish Varnish feature truly is.
Play Project #1 - Animating Bugs Around a Bulb
We hope this project helps you see that there is more to Cosmic Blobs animation capabilities than first meets the eye!
Labels:
3D Modeling,
Cosmic Blobs,
Project,
Tutorial
Cosmic Blob Tutorials - Animation Mode
While my grandchildren find every aspect of Cosmic Blobs fun, the real payoff for them is seeing the 3D models they've created walk around on the screen. They love animating their blobs!
This series of tutorials will explore the basic animation capabilities of the Cosmic Blobs Animation Mode. But, they will by no means be the last tutorials that we'll create to demonstrate more complex animation possibilities.
At first glance, the animations that can be created by Cosmic Blobs might appear to be very limited. But, the things we will show you in these basic tutorials are just the tip of the iceberg when it comes to the fascinating things the animation engine can accomplish. Yet, we have to start somewhere and a good place to start is with the basics.
Animation Mode - Sliding and Two-Legged Styles
The designers of Cosmic Blobs have provided a number of Motion Styles with which to animate your blob. In this tutorial we'll explore the styles related to simulating human, two-legged walking. We'll cover the animation 'Floor', the animation Path and the Animation Sliders that control the pace of the animation. We'll also cover recording a 30 second movie right in Cosmic Blobs that you can use in web sites or send to friends.
Play Tutorial #26 - Two-Legged Animation
Animation Mode - Snake and Four-Legged Styles
Cosmic Blobs also provides us with styles that can make our blobs slither across the screen like snakes, gallop like a horse or walk like a dog. In this tutorial we'll explore each of these animation styles and also introduce a Decoration Mode feature that blows the lid off of what you can do with Cosmic Blobs' animation engine.
I'd been anmating blobs for some time before I learned from one of the helpful Cosmic Blobs team members about the marvelous Vanish Varnish. When you paint the animation floor, or ANY blob, with Vanish Varnish it disappears while your animation is running.
Play Tutorial #27 - Snake & Four-Legged Animation
Future Tutorials
Our Animation Mode tutorials bring to an end to the primary tutorial series exploring the basic operation of Cosmic Blobs. But, many more tutorials are on the way. They will be dedicated to specific tasks like creating flying blobs or how to make a particular feature in a blob. While some of the primary tutorials were relatively long, we had some wide topics to cover. We'll do our best to try to keep future tutorials under two minutes in length. But, it's so much fun we can't make any promises!
Sunday, April 15, 2007
Cosmic Blobs Tutorials - Decoration Mode
Decorating your blobs is as much fun as creating the 3D shapes. In this series of Cosmic Blobs tutorials we will turn our attention to the many ways you can use your imagination to decorate the blobs you create with the built-in features that the Cosmic Blobs designers gave us.
And, we're also going to show you how you can create your own 'Stickers' so that your blobs truly reflect your own imaginative creations.
Decoration Mode - Backgrounds
In Cosmic Blobs we can select different images as true 3D environments for our blobs. We can also color the background using the Fill Tool. In this tutorial we will explore decorating our backgrounds.
Play Tutorial #19 - Decorating the Background
Decoration Mode - Filling with a Solid Color
The Bucket Fill tool allows us to paint our blobs with a full spectrum of colors. In this tutorial we will explore some of the behaviours of the fill tool as we work on 3D blobs.
Play Tutorial #20 - Decorating with Solid Fills
Decoration Mode - Filling with Patterns
While being able to paint our blobs with solid colors is great, it's not all we can do. The designers of Cosmic Blobs has given us the ability to fill our blobs with a variety of patterns. There are two types of patterns. Some have fixed colors and others permit us to choose their color combinations. We've divided our look at pattern fills into two different tutorials so that we can focus on the unique characteristics of each pattern type.
Play Tutorial #21 - Decorating with Fixed Patterns
Play Tutorial #22 - Decorating with Colored Patterns
Decoration Mode - Painting with Marker and Sprayer
The Bucket Fill Tool applies to an entire blob. Smaller, more precise control of the painting process is provided through the Marker and Sprayer Tools. Solid colors, Fix Patterns and Colored Patterns can be applied using these tools. In this tutorial we explore some techniques for controlling the behaviour of these tools.
Play Tutorial #23 - Decorating with Marker and Sprayer
Decoration Mode - Using Stickers
Stickers are a wonderful feature of Cosmic Blob. We can add many things such as eyes, noses, ears and other decorative features very simply using Stickers. Stickers can be resized and rotated, giving us a lot of control over how they are applied. We'll also explore how to combine the Pulls and Pokes to enhance the effects of the stickers.
Play Tutorial #24 - Decorating with Stickers
Creating Your Own Stickers
The fact that Cosmic Blobs is designed so that we can import stickers of our own design is a wonderful feature. This means that our imagination is the only limit to how we can decorate our blobs. In this tutorial we will show you how to use Ulead's PhotoImpact, a 2D paint and photo program to create stickers for use in Cosmic Blobs. We will also show you how to design your stickers with some of the Pull and Poke capabilites of Cosmic Blobs in mind. This is just plan fun!
Play Tutorial #25 - Making Your Own Stickers
Thursday, March 15, 2007
Cosmic Blobs Tutorials - Point Pull, Poke, Flatten & Pinch
Note: Relax your eyes and focus on the center of the image, if you are among those that can see a Crossed-Eye Stereogram, you should soon see fully 3D objects in the center of the image.
Making these tutorials has been a real joy. The tools that the Cosmic Blobs developers have given us are a pleasure to use. The tutorials being posted with this entry complete the Modeling Mode Toolset. These are the most basic tools that we use to manipulate our models.
Point Pull Tool
The Point Pull Tool is probably the most used tool in Cosmic Blobs. As with other so-called 'pull' tools, this one can both pull surface of a blob out or push the surface inward. It relies on a single 'Influence Slider' to adjust the behavior of the tool.
Play Tutorial #15 - The Cosmic Blobs Point Pull Tool
Poke Tool
The Poke Tool is another tool that gets lot of use when building 3D models in Cosmic Blobs. With this tool, you can 'Poke' OUT or IN. Animal ears, eye sockets and noses are among the many great uses for the Poke Tool. Two sliders are used with this tool. One slider determines the depth of the poke and the second the width of its influence.
Play Tutorial #16 - The Cosmic Blobs Poke Tool
Flatten Tool
The Flatten Tool may not be used as much as the two previous tools; but, it is no less important. With this tool you can feather edges or smooth the point on a cone. You can also use it to do exactly what it's name implies...flattening objects. This tool relies on a single influence slider to control its effects.
Play Tutorial #17 - The Cosmic Blobs Flatten Tool
Pinch Tool
It won't be long before this tool will become one of your favorites. It's extremely versatile and can be used effecively with every one of the basic blobs. It actually should be called the Pinch or Bulge tool becuase it does both. While the tool itself is locked to either a vertical or horizontal action, you can turn your blob to affect it at any angle. It's a favorite around here with the Torus tool and nothing is faster at creating a four legged creature to quickly show someone how Cosmic Blobs' animation mode works. This one is just pure fun!
Play Tutorial #18 - The Cosmic Blobs Pinch Tool
The tutorials finish the Cosmic Blobs Modeling Mode. But, there are two other modes in Cosmic Blob and we'll move on to creating some tutorials to show you these great tools, too!
Now that you have seen ow Cosmic Blobs works in the Modeling Mode, is there any wonder why we're Blob Fans???
Tuesday, March 13, 2007
Cosmic Blobs Tutorials - Curve Pull, Area Pull & Curve Push
Cosmic Blobs has a number of tools designed to let us easily manipulate the surfaces of our blobs. Some of these tools can only be used in conjunction with the three drawing tools. The drawing tools are the Line Drawing Tool,the Arc Drawing Tool and the Freeform Curve Drawing Tool. The three tools can can only be used in conjunction with the drawing tools are the Curve Pull Tool, the Area Pull Tool and the Curve Push Tool. The first two of these tools works with a drawing on a blob. The Curve Push Tool only works with a drawing that is NOT on a blob.
The following tutorials demonstrate each of these tools individually.
Curve Pull Tool
The name of the Curve Pull Tool can be a bit misleading becuase we can use this tool to both pull and push to lift or depress the surface of a blob under and around a drawn line. The Influence Slider determines how the Pull or Push affects the surface. It's useful for creating a mouth or pulling up an eyebrow ridge.
Play Tutorial #12 - The Cosmic Blobs Curve Pull Tool
Area Pull Tool
Like the Curve Pull Tool, this tool can push as well as pull. This tool is only activated when an area is enclosed by one or more joined lines that create a boundary around an area on the blob. Istead of simply pulling under and around the lines, this tool pulls the entire area defined by the lines. This tool is excellent for pulling out the neck, snout or ears of an animal or pushing in an area to form eye-sockets.
It's also useful to add complexity to things like robots. Used with Cosmic Blobs 'Stickers', it can add a three dimensional effect to flat drawings.
Play Tutorial #13 - The Cosmic Blobs Area Pull Tool
Curve Push Tool
This is the only tool of those that utilize the drawing tools to require that the drawing be done in space and not on the blob. It only works by being pushed toward the blob. The Influence Slider determines how much the push will affect the blob's surface. The important thing to remember is that while we may draw a simple line, the Curve Push Tool will treat it a plane and affect a wide area of the blob horizontally.
Of the the three tools, this is the most difficult to use and the least predictable. But, once harnessed it can do things like turn the sharp edge of a cube into a nicely curved edge (Filet).
Play Tutorial #14 - The Cosmic Blobs Curve Push Tool
Here is a sample using both Curve Pull and Area Pull to add complexity to the shape of an insect robot's head.
Labels:
3D,
3D Modeling,
Cosmic Blobs,
Tutorials
Sunday, March 4, 2007
Cosmic Blobs Tutorials - Modes, Bend, Scale & Join
Cosmic Blobs permits us to design, decorate and animate our blobs using three different modes. The Modeling Mode is where we create the shapes for our blobs, the Decoration Mode is where we add color and 'stickers' like eyes and the Animation mode is where we set our blobs in motion to music in a variety of ways. Tutorial #5 introduces you to the Cosmic Blobs Modes.
In Tutorials #6 through #10 we begin to introduce some tools only available in the Modeling Mode.
The 'Modeling' mode of Cosmic Blobs includes a number of tools to help you reshape the basic blobs into models that you envision. Among them are the 'Bend' tool which, as the name implies, allows you to bend objects into new shapes; the 'Scale' tool that permits you to resize your objects and the 'Join' tool that creates a single object from two separate objects.
For your convenience, here are links to the previous tutorials. If you haven't already watched them, we suggest that you use these links to see them now.
Play Tutorial #1 - The CosmicBlobs Help System
Play Tutorial #2 - The CosmicBlobs File System
Play Tutorial #3 - The CosmicBlobs Undo/Redo Feature
Play Tutorial #4 - Moving and Rotating CosmicBlobs blobs
Play Tutorial #4a - Using Mirror to Rotate More Precisely
Here are the new tutorials we've added:
Cosmic Blobs Modes:
Play Tutorial #5 - The CosmicBlobs Modes (Modeling, Decoration & Anmation)
Cosmic Blobs Bend Tool:
Play Tutorial #6 - The CosmicBlobs Bend Tool (Sheet & Cube)
Play Tutorial #7 - The CosmicBlobs Bend Tool (Torus & Cone)
Play Tutorial #8 - The CosmicBlobs Bend Tool (Sphere)
Play Tutorial #9 - The CosmicBlobs Bend Tool (Cylinder)
Cosmic Blobs Scale Tool:
Play Tutorial #10 - The CosmicBlobs Scale Tool
Cosmic Blobs Join Tool:
Play Tutorial #11 - The CosmicBlobs Join Tool
While Cosmic Blobs is designed to be easier than any other 3D modeling application, we hope these tips make it even easier for you to begin to create your own wonderful blobs even more quickly. The more you know about the great features of Cosmic Blobs the more, we're sure, that you will like it.
We hope that you will enjoy these tutorials while we set about enjoying making some more!
Labels:
3D Modeling,
Bend,
Cosmic Blobs,
Join,
Scale,
Tutorials
Wednesday, February 21, 2007
Cosmic Blobs May be Dangerous to Grandfathers
Cosmic Blobs has become a 'must do' activity when I get together with my grandchildren. But, I'm not really sure this is a safe activity any more!
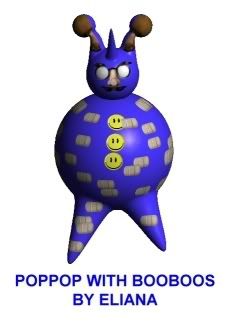
They've decided that making a 3D PopPop gets the most reaction... mostly howls of protest from the victim. Eliana is not yet 5 and she can get around Cosmic Blobs with very little help. She discovered the 'Stickers' feature in a big way with this rendition of "PopPop with Booboos". At least the bandaids weren't Princess Bandaids that she's been known to cover herself with from head to toe!
PopPop With Booboos
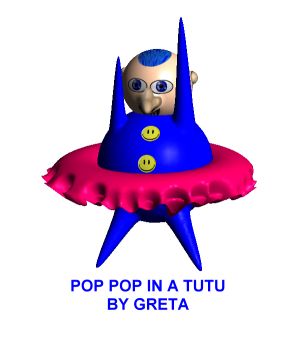
Greta has just turned 7 and decided to create her worst nightmare.... PopPop in a Tutu. Come to think of it, it's my worst nightmare too!
Pop in a Tutu
Hmmm... Maybe we'd better find a NEW activity! Naaahhhh! This one's too much fun for all of us!
Tuesday, February 6, 2007
The Learning Company to Market Cosmic Blobs!
We just heard some great news about CosmicBlobs!
The Learning Company, the publisher of Kid Pix® is now going to distribute the standard edition of Cosmic Blobs.
You can read the press release right here!
The Learning Company Licenses Cosmic Blobs Standard Edition
We believe that Cosmic Blobs is one of the finest computer activities for children that we've ever used. The Learning Company has earned the respect of parents and the educational community for outstanding educational software and graphics products such as Reader Rabbit®, Carmen Sandiego™, The Clue Finders®, The Oregon Trail®, and Kid Pix®.
We believe that this is a beautiful match and we are very excited about this agreement. Now, we have two great sources from which to buy Cosmic Blobs! You can still buy Cosmic Blobs - The Deluxe Version and the Educational Version at .
Labels:
CosmicBlobs,
Education,
The Learning Company
Thursday, January 18, 2007
An Introduction to Cosmic Blobs
How many times do you find the perfect blend of fun and learning? It's a rare combination. It's especially rare to find this combination in a software application that is beautifully designed. Cosmic Blobs IS that rare combination.
There is so much to like about Cosmic Blobs. But, like any program, to get the full benefit of all it has to offer we need to learn some new skills. And, the quicker we learn those skills the faster we can begin to fully enjoy all that CosmicBlobs can do. That's why this blog exists... to provide a place for sharing tips, ideas and tutorials.
We will be posting a full series of user created tutorials. They won't be slick. They aren't official... becuase we have no connection, except as users, to Solidworks or the Cosmic Blobs development team. We may even get some things a bit wrong from time-to-time. These offerings are simply home-brewed video captures of some of the things we've discovered as we've worked with Cosmic Blobs that we think might be helpful to others. We hope you agree.
We have already created four tutorials covering a few of the basics of Cosmic Blobs. Almost everything in these tutorials also applies to CB Model Pro. Each is around 3-4 minutes in length.
Tutorial #1 - The Cosmic Blobs Help System
Learning how to take full advantage of the Cosmic Blobs Help system will go a long way to ensure that your learning experience goes smoothly and quickly. Not only has the CosmicBlobs team provided a unique Step-By-Step context sensitive help system, they've included some very helpful links to their own online tutorials and lessons right in the Cosmic Blobs application. We'll also show you how to bring back the Koala Bear lesson that cam up the first time you started Cosmic Blobs.
Play Tutorial #1 - The CosmicBlobs Help System
Tutorial #2 - The Cosmic Blobs File System
The saving of your blob files is done automatically in Cosmic Blobs. In this tutorial we show you how this works and also tell you why using the 'Copy' feature is sometimes wise.
Play Tutorial #2 - The CosmicBlobs File System
Tutorial #3 - The Cosmic Blobs Undo/Redo Feature
Cosmic Blobs' almost unlimited Undo and Redo keep us from having to worry that we will get into major trouble while experimenting with our blobs. We'll show you one important exception.
Play Tutorial #3 - The CosmicBlobs Undo/Redo Feature
Tutorial #4 - Moving and Rotating Cosmic Blobs blobs
In Cosmic Blobs, we deal with moving and rotating on two levels... the Cosmic Blobs' "World" and individual blobs. In this tutorial we'll show you all the Cosmic Blobs controls for moving and rotating at both of these levels. We'll also show you how to more precisely line up blobs when things go out of kilter.
There are two tutorials related to moving and rotating blobs. After the first was finished, we discovered a cool trick using the 'Mirror' tool to help us lock blobs, so that they turn on a single axis, making our rotations even more precise!
Play Tutorial #4 - Moving and Rotating CosmicBlobs blobs
Play Tutorial #4a - Using Mirror to Rotate More Precisely
We hope that you find all of these tutorials useful... in spite of the occasional background noises from the squeeky chair. Hey! They're FREE!
Labels:
3D,
3D Modeling,
blobs,
CB Model Pro,
CosmicBlobs
Monday, January 8, 2007
Blobs! More fun than you can imagine!
Do you like art? Do you like animation?
Then this is your lucky day becuase we're going Blobbing!
What's a Blob?
A lump of virtual clay. It just sits there until YOU do something with it. You push it, pull it and twist it into anything you want. Then, sometimes, you animate it!
How?
We were hoping you would ask.
We can begin by using a wonderful program called Cosmic Blobs. It's a 3D modeling program for children (and grandfathers using their grandchildren as an excuse) that is absolutely marvelous! And, the best part is that it is very reasonably priced... at the time of this writing just $39!
That is a REAL bargain.
But, it gets even better than that. There is an 'Upgrade Path' for Blobbers. Solidworks, the company that created Cosmic Blobs is also developing CB Model Pro with additional capabilities for those wanting to extend their blobbing skills.
You can download a 14 day trial of Cosmic Blobs at http://www.cosmicblobs.com/ and begin right away!
We don't work for Solidworks or The Learning Company. We're just Blobs Fans that enjoy creating 3D objects and animation. Our hope is that we'll all have a great time and share some wonderfully creative ideas, images and videos. Let's get to it!
Labels:
3D Modeling,
blobs,
CB Model Pro,
CosmicBlobs,
Mudbox
Subscribe to:
Posts (Atom)